Because I'm Me

AND MORE

  • Home
  • Our Story
  • Contact
  • Become a Retailer
  • Shop
  • Facebook
  • Jude Harbor
Super easy and delicious five ingredient Decadent Toffee recipe

This toffee is a family tradition in this house. And it's easy, five likely-to-have-on-hand ingredient easy. And not one of those ingredients is healthy. Yup, it's awesome stuff.

The original post, with some helpful user comments, can be found here.

Here's the skinny (very rebellious word for this post) on this awesome toffee:

{Printable Recipe}

Imitation Heath Bar Toffee

1 lb. butter
2 C. sugar
1/2 C. water
1 t. salt

Combine above ingredients in reasonably large pot.  Don't use your best pot, the pot won't be super easy to clean when you're finished, but do make sure it's a tall enough pot. The one I use is a 3 qt. pot.

Bring to boil, stirring constantly to 300'.  I wear on oven mitt while doing this, it will splatter and it's hot enough to leave little burn marks like I had in 2004.  I also keep a damp cloth near me so I can wipe up the splatters while they're still liquid. You really need a candy thermometer while cooking ... the recipe will heat to about 220' very quickly, then slow down, and then right at the end heat quickly to 300' so don't become discouraged if it's taking a little while.  The mixture will change from light butter yellow to golden yellow and thicker, to dark gold and even thicker and less splattery, to finally medium-dark brown. This is where the candy thermometer really comes in handy, as it's easy to think it's done before it is ... even you pour it too soon it'll still be quite tasty, but chewier.

Immediately pour onto cookie sheet. I use a cookie sheet with sides, but have done it with a regular cookie sheet too.  I also keep stirring while I pour as the bottom of the pan tends to burn a little at this step.

16 oz. chocolate chips

Sprinkle with chips and spread them out as they melt.

Let cool in fridge.

Cut or break into pieces.  A combination of both seems to work perfectly, and leaves lots of little crumbs for the cook to "taste test".

To clean the pan, stirring spoon, and thermometer I add water to the pan and bring it to a boil again, letting all the leftover sugary buttery goodness melt. The pan may still need a good cleaning (I soak it in a little water and dish detergent) but the other utensils should be super easy to clean.

Try it and let me know what your family thinks!


  • 0 Comments
One day my oldest daughter turned 21. I have no idea how that's possible, being as I'm just so very young myself, but it happened. To celebrate this monumental occasion we visited Olive Garden with the whole family and Cassie had her very first ever alcoholic beverage (b.s., but I like to tell myself these things, so indulge me). The ladies at the table ordered Italian Margaritas, an Olive Garden specialty.


Well, it was a very good margarita. And I still can't believe she's 21.

So good that I decided to make a few at home. Italian Margaritas call for Amaretto, which was fine until I priced it at the liquor store. $25ish just wasn't in the budget.

Make Your Own, and save a small fortune, Vanilla, Triple Sec

The maker in me decided I had to be able to make it myself, so I did. It's really quite simple, actually.

Save Money, DIY homemade vanilla, triple sec, amaretto

I followed this recipe and had very easily homemade amaretto in under an hour. However, it wasn't very good after an hour. It took another week or so to sit and allow the flavors to blend and settle, and is now very, very good.

The cost savings were ridiculous and well worth the minimal DIY effort.

Save Money, DIY homemade vanilla, triple sec, amaretto

Feeling awfully proud of myself and amazed that these things could actually be home made, I decided I could also make Triple Sec, another margarita staple. Because, why not? For the triple sec I followed this recipe. I found a lot of recipes for triple sec, each of which was very different. This one came out very nicely, a little less orange flavor than I'd like and a little more clove-y than I'd like, but good overall.

What's next? Homemade sour mix, of course, which required gathering two cups each of fresh lime and lemon juice. The sour mix was good, but not good enough to spend all that time juicing fruit. Sour Mix isn't very expensive, so I'll stick to store bought, thank you very much.

Save Money, DIY homemade vanilla, triple sec, amaretto

A few days later, still feeling great about my new found skills and all the money I saved I decided to make vanilla. I purchased beans here, though I'm sure you could purchase them elsewhere just as well and I really have no justification for buying the ones I did other than that they were a good deal. Some recipes call for slicing the beans, some say just chop them and the end result will be the same. I went for chopping and added 13 chopped beans, in about 1/2" pieces, to about 20 oz. of inexpensive vodka. Each day for 30 days the bottle is shaken and then, voila, vanilla is made.

Save Money, DIY homemade vanilla, triple sec, amaretto

My plan is to only take what I need from the bottle, straining it into a tiny bottle. As the original vodka/bean mix is depleted I'll add more beans but instead of vodka I'm going to use a bourbon for the base instead. I think the flavor will be much richer and smoother.

I now had these awesome mixes sitting in square Ziploc containers, which were impossible to pour from and were kind of bulky. The kids and I headed out to Target to see what they had in pretty glass closable bottles. We did find some beautiful ones but they ran about $6 each, which was more than I was willing to spend.  I remembered the infused vinegars I'd given as gifts a few years ago, packaged in Perrier bottles, so we headed over to the beverages section. The Perrier is now sold in plastic so we searched until we found some Rose's Cocktail Infusions on clearance. Pretty cool wavy glass bottles for between $2 and $3 each. Perfect solution, especially with the nice, narrow mouth for easy pouring.

I purchased sparkling cider for the kids to mix the flavorings into and we came home and drank them out of fancy plastic champagne glasses left over from New Year's Eve.

After the bottles were emptied the labels pealed right off. I removed the remaining glue by spraying Goof Off and wiping it off. Super simple. After a good washing the bottles were ready for use.

Save Money, DIY homemade vanilla, triple sec, amaretto

In the meantime I took some pictures of River, because that's always fun.

Save Money, DIY homemade vanilla, triple sec, amaretto

I created the labels in PicMonkey, creating a wordless template at the same time so I can go back in and add different lettering to the labels as I fill more bottles (I have many more). The labels were printed on mailing labels from Because I'm Me and applied to the bottles.


Save Money, DIY homemade vanilla, triple sec, amaretto

That's all there was to the project.

I've also been making homemade tortillas, both flour and corn. Word of warning on that one: Don't do it. Once you do your family won't ever want to go back to store bought and they'll ask for homemade tortillas all the time. Thankfully, they're so simple most all the kids are quite adept at making them.

Have you made your own liquors or vanilla? Please share your story!

Save Money, DIY homemade vanilla, triple sec, amaretto


  • 0 Comments


I hope you enjoyed yesterday's recipe.

Our baking began this year with some almost-free refrigerated cookie dough from the grocery store, the kind that comes in a tray of little squares and involves absolutely no work but to toss them in the oven. I hate to admit it, but they were quite good.

  • 0 Comments
I can't believe how little River was. So cute. Great recipe too.

--------------------

My kids really liked this, thus I had to share .

And most of the ingredients were really inexpensive due to sales and coupons ... wanted to pass along that part too, just in case there's a reader out there who isn't paying attention to the great deal blogs.  Once you begin to coupon and shop carefully you'll be hard pressed to go back to paying full price for much of anything (and some things, like toothpaste, toothbrushes, shampoo, etc. I wouldn't ever pay more than $.25 for ... because they can easily be gotten for free).

No pictures because by the time I realized the kids were eating this and liking it it was almost gone (instead at the bottom of the post is a picture of R. eating mini wheats).

Here goes ...

Crock Pot Chicken and Green Olives

1 lb. chicken tenderloins or breasts
a bit of salt and pepper
1 tbsp. dried chopped onion (or 1-2 chopped onions sauteed in a little oil to soften)
1 tbsp. flour
2 c. white cooking wine or dry white wine (you could use chicken broth too but the wine taste is so nice with the olives)
3 cans diced tomatoes, don't drain
1 tsp. rosemary, crushed
1 tbsp. thyme
1 tbsp. parsley
1 jar green olives with or without pimentos, but without pits
a handful or two of fresh spinach, chopped (the more the merrier ... we love fresh spinach)
*look in the fridge and see what else you could add ... maybe mushrooms or thinly sliced carrots

1 lb. pasta

Add all ingredients, except the pasta, into the crock pot in the order listed.  Cover.  Turn it on - low for 5-6 hours, high for 2-3 hours.

Cook the pasta according to package instructions.

Serve the crock pot meal over the pasta.  We pulled out a piece of chicken per person first, then ladled the rest on top.


  • 0 Comments
Jason's Deli Tomato Basil Soup, as good now as it was when this was first posted, April 28, 2008. One summer, on vacation, some of the kids got sick and I went and bought a blender and a basil plant to make this for them. I didn't mind, it's that good.

------------------

I love the tomato basil soup at Jason's Deli ... actually, I like a lot of things there (the hummus on the salad bar is awesome with veggies!), but I especially like the tomato basil soup. Unfortunately for me we're trying to cut restaurant dining out of our budget so I had to find an alternative tomato soup, and I have.

This recipe is super easy, really good and very inexpensive if you pay $.16 a can for your diced tomatoes and use free butter.*


Tomato Basil Soup

3 cans diced or crushed tomatoes
4 c tomato juice or chicken broth (I use broth)
1 small can tomato paste (leave it out of you don't have it on hand)

Simmer these together over medium heat for about 30 minutes. Puree in small batches in blender or food processor with 14 basil leaves ... the soup should be very smooth.

Add:
1 cup heavy cream
1/4 lb. butter
salt and pepper to taste
1-2 tbsp. lemon juice, if desired

Heat thouroughly, being careful not to boil.

That's it. Easy peasy. Feel free to experiment with garlic, onion, crushed red pepper, and whatever else floats your boat.

  • 0 Comments
Originally posted August 10, 2010, this wonderful yogurt deserves to be shared again. I still make it constantly and have taken to using yogurt in place of sour cream and mayonnaise, especially in casseroles and on tacos. Greek yogurt can be used in place of regular yogurt.This is such a great money saver!
----------------

This is not a new concept, or my own concept.  Mostly I'm printing this here because I get asked so often for the recipe and referring to this post will be much easier than retyping it each time!

Originally, I found the recipe here.  Another great easy-to-follow rendition is here.  After giving you those links I know I don't have much else to say on the subject but I'll give you my "plan of attack" anyway.

In the crock pot goes 8 cups of milk.  I use whole milk because that's what I buy.  You can use 1% or 2%.  Turn the crockpot on low and let it sit for 2.5 hours.

After 2.5 hours turn the crock pot off, unplug, and let it sit for 3 hours.  Now, you can let it sit longer if you want (or if you forget about it ... not that I've EVER done that. much.) but it leads to more sour yogurt if it sits too long.  Just know that you don't have to be rigid with any of the times, but they do seem to produce the best results.

After 3 hours add 1/2-1 cup yogurt (I use one cup or so of a quart container of lowfat vanilla yogurt).  You can use plain or flavored, regular or greek or one of the "plus" kinds ... the greek and plus ones seem to produce slightly thicker yogurt and the other cultures in them also seem to grow (I don't know this for a fact, but I choose to believe it), so I go with these.  I add 1/2-1 cup sugar or honey at this time as well, stirring until it's dissolved.  Sometimes, if I have it on hand, I add in a tbsp. or so of vanilla, but if I don't have any I don't sweat it.

Cover the crock pot with a thick towel or blanket and let it sit for 8-12 hours.

Eat.

The yogurt will generally be slightly runnier than regular yogurt.  That's fine.  For babies I freeze little bits in ice cube trays and give them that to work on - great for teething and lets them eat it themselves.

I store it in the fridge in ziploc containers.  If I have fruit on hand I'll add it in before storing so the kids can just grab and eat. You could also freeze the yogurt, in this house I'm lucky to not run out even when making batches back to back.

Or I make smoothies with yogurt, ice, raw spinach, and fruit ... and whatever else we have on hand.  The spinach will make the smoothie green but it won't make it taste like spinach so it's a good way to up that iron and green leaf intake.  I freeze little bits of that for the babies too.

It didn't take long at all for my kids to decide that they liked Mama's yogurt better than store bought.

I broke down the cost once but I don't have the results right here ... basically, 1/2 gallon of milk is about $1.50, 1 cup yogurt is about $.50 (not that I'd ever actually pay full price for it, but if I did it'd cost that!) ... total cost for 9 cups of yogurt = $2 ... about $.22 a cup.  Single serve yogurts at the grocery store are less than 1 cup, so this ends up being a really good price, it doesn't beat a super Publix BOGO deal topped with coupons (which is when I stock up on the starter containers of yogurt and freeze them for future use), but still, it's a really good price and you have more control over the final product.
  • 0 Comments

Knock knock.
Who's there?
Banana.
Banana who.
Knock knock.
Who's there?
Banana.
Banana who.
(continue with banana until the other person is ready to knock knock you)
Knock knock.
Who's there? (oh yeah, they've had it with you now!)
Orange.
Orange who.
(answer at the end of the post)

Because I'm Me boys orange dot necktie

8 of the last 15 ties sold in the shop have been orange. Orange is awesome, isn't it?

Because I'm me orange neckties and bow ties for boys and men

It doesn't hurt that oranges are also deliciously in season right now. The kids have been devouring little Clementine's as fast as I can get them. I prefer bigger oranges myself, but I like the single serving size of the little ones, and how easily they peel.

Because I'm Me boys orange medallion print necktie

Back to the ties, Martha Stewart has some gorgeous orange wedding ideas here and here.

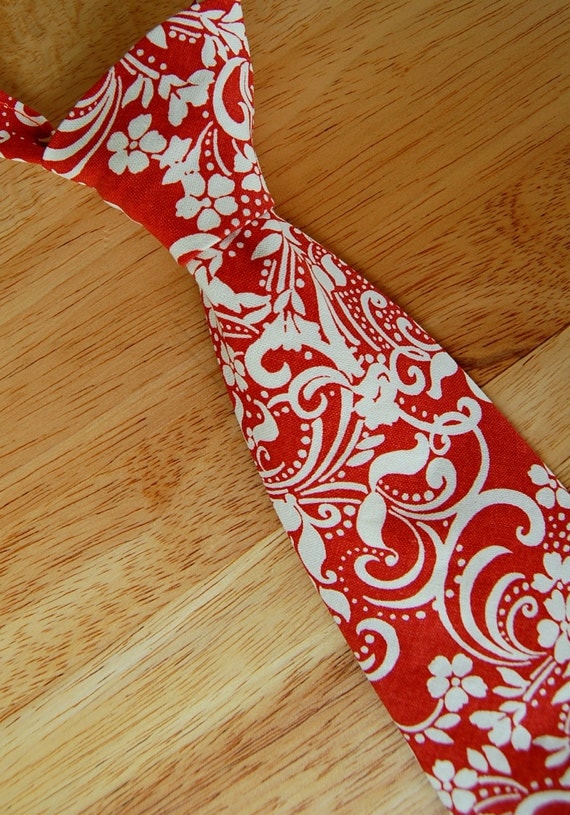
Because I'm Me burnt orange swirl necktie

And how about an orange wedding dress? Or an orange suit?

Because I'm Me orange dot bowtie for boys and men

Have you visited How About Orange? Great modern, artistic blog, full of ideas, fonts, and downloads.

Visit the shop for these and more great orange ties.

And now the punch line: 
 Orange you glad I didn't say banana again?

  • 0 Comments

Christmas 2011 was the year family and friends received infused vinegar sets as gifts.

I made four flavors -

Strawberry (1 jar of strawberry sundae syrup)
Mixed Berry (1 bag frozen mixed berries, pureed, 1 C sugar)
Jalapeno and Garlic (a couple large spoonfuls of minced garlic, the rest of a jar of jalapenos, drained)
Rosemary (1 spice jar of rosemary, a sprig of parsley for each bottle)

For each flavor I used 4.5 cups of vinegar. The vinegar and flavoring were brought to a boil, then cooled. When cool each flavor was placed in its own sealed container and stored in the pantry for about a week (48 hours - 2 weeks is recommended). The vinegars were then strained through a coffee filter and poured into bottles.

The bottles are Perrier bottles. A 4-pack of Perrier cost less than 4 glass bottles, came with a snazzy carrying case (I turned the cardboard wrapper inside out), and added a little novelty to the vinegars.

The vinegars can be used in marinades, on salads, veggies, or fruits, or in favorite recipes.

Cost per gift was about $6.

  • 0 Comments
***Save 25% in the Because I'm Me shop with coupon code BLACKFRIDAY. Good through Monday.***

Sunset on Thanksgiving at the beach. Perfect end to the day.

Our Thanksgiving was wonderful.


Early rising to prepare the stuffing and get the turkey into the oven. Parade watching. Last minute trip to the store. Food preparing.

Holiday table.

Family. Laughter.

Holiday table.

 Talking, lots of talking.

Holiday table.

 Eating, lots of eating. Perfection.

Then to the beach for a second Thanksgiving meal.

I dig you, found written on a shovel at the beach. Adorable.

Best beach find ever, the world's cutest little shovel. Left to brighten the day of another stranger.

The family. Because I'm Me.

I am blessed.

The teenagers. Because I'm Me.

These little ones grew taller than me, two of them just this year. Gorgeous. Smart. Talented. I love them so.


Blessed once again, by a beautiful sunset. Goodnight Thanksgiving. Because I'm Me.


Good night Thanksgiving.
  • 0 Comments
The kids and I are in the midst of a crazy busy week ... the scouts are selling popcorn, the sailors are sailing, I'm making bow ties and neckties, and school is, well, school.

I have a post to post, but haven't had a minute to complete it. I must share this with you though, as the leftovers are almost gone and I'll forget about it until I make it again ...

This slow cooker taco meat is awesome. I made it with chicken instead of beef and substituted garbanzo beans for the pinto beans in a smooth "use what you have" move and it was wonderful. Easy too. So make it. Tonight. You'll be glad you did.

Sorry, I don't have a pretty picture. There was no time for that.

Enjoy your Tuesday.
  • 0 Comments
A chili cook-off contest was held in our community the other day.


The Boy Scouts, in an effort to increase visibility in the neighborhood and to do something fun together, decided to participate. Instead of cleaning up or just helping out they wanted to be in the contest, showing mad skills.

A few points that had to be pondered:
  • They didn't have a recipe and they aren't yet great cooks.
  • The event organizers asked that cooks be over 18 (they were willing to waive this for the scouts).
  • It's in the 90's every single day. It'd be awfully hot to cook in and it'd be awfully hot to eat hot chili in.
My oldest daughter suggested a cold chili. More specifically, a dessert chili. With cake and candy, that looked like chili.

It:
  • Wouldn't have to be cooked at the event
  • Required little prep work
  • Would be cool and refreshing
  • Was unique (so unique that we couldn't find any recipes to borrow from)

We scoured the grocery store aisles looking for ideas for a sweet dessert that would look like chili. After a few test samples and a bit of trail and error a recipe was chosen. The troop sampled the recipe and agreed that it was "the" recipe.

"Chilly Chili" was born.

And it won! Won the whole chili cook off. Woo hoo and congratulations to the troop!

Recipe:

(as served by the scouts)

Chilly Chili

1 package instant chocolate pudding
1 package instant vanilla or butterscotch pudding
4 cups cold milk
1/4 tsp. red food coloring gel
1 package brownie mix, made according to package instructions, then chopped into bits with knife or food processor (makes about 8 cups)
1/4 cup diced maraschino cherries and juice (again, use the food processor to make quick work of this step)
1 box Boston Baked Beans candy
shredded coconut
red and yellow food coloring gels
whipped topping

Mix milk, 1/4 t. red food coloring, and instant pudding packages according to package directions.

When pudding has set add 3 cups brownie crumbles (to look like ground beef), Boston Baked Bean candy (for beans), and cherries (faux tomatoes). Mix with spoon.

Pour into serving cup.

Top with shredded coconut (cheddar cheese), colored lightly with red and yellow food coloring to a good cheddar color.

Top with a dollop of whipped topping (sour cream).

Serve immediately.

Shop Because I'm Me
  • 8 Comments

Every once in a while the stars align and goodness is created.

I'd purchased a few containers of Philadelphia Indulgence Chocolate Cream Cheese Spread super cheap after a sale at Publix and coupons. But what do with them? Not many ideas. We'd enjoyed the white chocolate flavor on graham crackers and it was delicious. The milk chocolate flavor sat in the fridge awaiting inspiration.

Inspiration came this morning in the form of this pin for Cheesecake Stuffed Strawberries. I had chocolate cream cheese. I had strawberries. The stars were aligned. It was so on.

Quite simply, I removed the tops of the strawberries and made sure they had an empty cavity in the center. I put the chocolate cream cheese spread in a piping bag and piped it into the strawberries. We sat on the lanai and enjoyed. So refreshing and so good.

*I did try using a baggie to pipe the cream cheese and the baggie exploded, this cream cheese was just too thick.
*If I'd been making this for more than a midday snack I'd have topped it with some sort of cookie crumb or shaved chocolate, but as is it was perfect.
*This would be great with the white chocolate cream cheese too.
*Kraft isn't compensating me for this post. (not that I'd say no if they offered)

Enjoy.


.
  • 0 Comments
Yes, a more aesthetically pleasing photo would have been created by trimming off the edges of the chocolate. But waste chocolate? I think not.

Kiwi and chocolate are amazing together. Such a treat.

The peeled sliced kiwi was frozen, then dipped into homemade "Magic Shell" topping, and chilled in the refrigerator until served.

Homemade Magic Shell
8 oz. semi-sweet chocolate chips
2 T coconut oil

Combine the chips and the coconut oil and heat in the microwave for 30 seconds. Stir, heat for an additional 30 seconds.
Store in the pantry. Do not refrigerate. I store ours in a ketchup-type dispenser from the dollar store. If it gets hard in the container just microwave it for a few seconds.
This stuff is so delicious.
  • 0 Comments
Today Because I'm Me is featured at The Attic Light, with crayon holders offered for just $8 each. My love for these crayon rolls is still going strong, they are just so dang cute, practical, and fun to make.

"Another daily deal site!?"

I know. There are quite a few of them out there. What I can tell you about The Attic Light, though, is that the person from the site who I've been working with, Devon, is the nicest, sweetest person around. The items they've offered so far are good deals, definitely worth a look around.

I follow The Attic Light on facebook and won a $10 credit last week. I used part of that credit yesterday to grab a great deal on bottle caps ... they were free - free to everyone - the credit I used just covered the minimal shipping. Gotta love that! I'm not sure what I'll do with them, but I can't wait to play. Have you made anything with bottle caps?

And now a totally different subject, with no smooth transition ...

My mother has always been an "interesting" cook. She loves to experiment and try recipes that are "creative". Sometimes she comes up with a winner, like some topped with crunched up potato chips (I was a kid, I liked simple things like potato chips). But not every culinary adventure was a success.

The most memorable "interesting" meal for me was Fish Soup. I couldn't tell you what was in it, other than bones. All I remember about the entree itself is trying to eat it and finding little fish bones throughout my fish soup. By the end of the meal I was crying, my sister was crying, and my parents were in quite the fight. So bad that my mother put on her coat and left the house (we were very upset by that, of course, but secretly a little relieved ... after all, she'd just served Fish Soup).

My mother returned home after an hour or so and hopefully we all apologized profusely to her. Fish Soup was never served again. No one has forgotten it though. It truly stands out, to me, as the worst meal of my childhood, and to this day I do not eat fish - no way, no how.

Last night I decided to make my kids Tofu Chocolate Mousse Pie.

Memories of Fish Soup flooded me as I went about making this. Would this be my Fish Soup? I wondered if this one would go so far as to blacklist me from every future "Mother of the Year" contest. But if it was good, and Mommy actually made and served dessert, my kids would adore me forever, right?

Can you see the gritty bits of chocolate? Sigh ...
It came together very well. I tasted it. Not bad. Not the same as Chocolate Mousse, but not bad. And then I got creative and added some chocolate chips to the food processor, which totally changed the texture - instead of smooth and creamy it now was smooth with little hard "sandy-ish" bits that totally killed the smooth texture it'd had before. Bad move on my part, and may have been the undoing of the dessert.

The verdict: No one cried and I didn't leave the house. The kids and I decided that Tofu Chocolate Mousse Pie was not bad (most of them ate what was on their plates), and was a taste that could be acquired, especially if you weren't comparing it to regular Chocolate Mousse Pie, but wasn't a taste we'd acquired yet, and probably wasn't something we'd make again. I think we're just to accustomed to the sweet sugariness of "typical" desserts.

Hey, we all got a healthy dose of tofu out of it, and it sure didn't taste like tofu! Overall, I was impressed.

There are other new recipes I'll be trying though, so my Fish Soup may still be out there somewhere.

update: I made the pie last night and we ate it about an hour after making it. I just now ate a sliver of the leftovers. And I swooned. I think it just needed to chill longer than I chilled it for. It's good. Very good. 

And it's gone. Very gone. (I did stop him from licking the platter clean, much to his dismay)
  • 0 Comments

 A visit to our local u-pick citrus. We've seen their little signs for years and finally made the time to visit.


It was one of our best adventures yet. Grapefruit, a cat, lemons, signs, tools, an alligator, friendly owners, and more oranges than we could ever pick (and just $9 for a 5 gallon bucket of oranges!).


  • 1 Comments
I managed to cross two major tasks of the "to do" list today.
  •  Cooked and pureed two pumpkins, and now have 24 cups of pureed pumpkin to get us through til next Halloween. And it only took a total of 6.5 hours. I'm good with not playing with pumpkins for another year.
  • Updated the shop. It needs some detail work (um, lots of new pictures!), but the number of items available has almost doubled. Just in time for holiday shopping to begin.
Oh, and I came up with a few exciting new quilt ideas I can't wait to get started on. 

I hope you've had a productive Tuesday as well.
  • 0 Comments
I'm going to try to be consistent with this ... on Monday, as the title suggests. We'll see.

Sunday - Homemade Macaroni and Cheese (recipe to come), salad
Monday - Chicken Fried Rice*, salad
Tuesday - Southwest Roll-ups using homemade refried beans (the kids loved this meal, I was surprised)
Wednesday - Spaghetti and tomato sauce, broiled zucchini**, salad
Thursday - Marinated Chicken on the grill, salad, grilled yellow squash
Friday - Quiche (a variety - probably turkey bacon & broccoli, cheeses, and vegetable)
Saturday - something in the crock pot

*Chicken Fried Rice

I don't really have a recipe for this, but here's the basic idea:

Heat 1 T oil over medium/medium-high heat. Add chicken and cook til white on the outsides. Add diced misc. veggies (peas, carrots, onion, zucchini, broccoli, mushroom, water chestnut, etc) ... great time to clean out the produce drawer and cook until they are softened. Add rice that is at least 24 hours old and cold, if you precook and freeze rice that's great too (and a huge time saver). When the rice is warm and separated create a crater in the center and cook 2-3 scrambled eggs. After eggs cook toss everything together and coat with low sodium soy sauce. Mix well and serve.

If you don't want to use oil use a smidgen of chicken broth instead. Really.


**Broiled Zucchini

Halve zucchini lengthwise and score, spread a bit of butter or spread on, sprinkle on some parmesan cheese and seasoned bread crumbs, broil for 2-3 minutes until browned.  Feel free to add garlic or parsley or basil or whatever on top before broiling. My kids love this and will happily eat yellow squash or zucchini cooked this way (cooked most ways, actually, but this is a fave).
  • 0 Comments
River, in his big brother Adam's apron. As soon as I made River one of his own I'll post a tutorial.


Not long after these were taken the house began to smell of rich, decadent zucchini bread.
  • 0 Comments
recipe: here


Butter, cheese, flour, salt, and a smidgen of red pepper flakes and milk. And they taste like a Cheez-It, which is rather amazing after reading the not-exactly-food ingredients in a Cheez-It.

I cut mine shorter than the original poster did. I'm feeding toddlers, it made sense.

Were I to make them When I make them again I will roll them thinner as they are nice and rich, I will try wheat flour (after a nasty weevil invasion a few years ago I've limited our flour supply to only what fits in the freezer and don't have wheat flour, neither does my local WalMart where I went shopping last night), and I'll try adding parmesan cheese.

Are they "healthy"?  I suppose not ... cheese and butter aren't the best things. Are they healthier than a package of Cheez-Its? Seems to me they can't help but be. As an occasional snack I think they're a great addition to my recipe file.

Are they cost effective? Dang it, not so much. My end product was just over 8 oz. (we ate a few before they got weighed ... couldn't help it, I ate a few while taking the above picture too ... couldn't help it) and I figured my approximate cost was just under $2. Not bad, but not as wonderful as crock pot yogurt.

I see so many perfect occasions for these ... like every time the kids come to me needing an event snack - in an hour.

If you try these I'd love to hear about your experience.

I've other crafts to write about but must take some pictures first.
  • 0 Comments
Older Posts Home

Follow Us

  • instagram
  • facebook
  • rss

BANNER SPOT

Shop

recent posts

Labels

Arts and Crafts Baby Sewing Because I'm Frugal Because I'm Me Because I'm Me Website Bow Tie Boys Fashion Busch Gardens Camera Cats Fashion Childcare Computer Stuff Cooking and Recipes Coupons Craft Show Crafting and Sewing Ditto Kiddo dog bandana Etsy EWP Family Vacations Fashion Set Mens Food Freebies Frugal Friday Fun and Free Gift Ideas Give Away Giving and Charitable Doings Green Life Holiday Fun Stuff Home Schooling Homeschooling Essentials Jude Harbor Link Up Mens Fashion Neckties Other People's Crafting Outdoor Activities Photography Pocket Square Pop Up Camper Publix Purex Insider Quick Tutorials Quilt Recommended Sites and Links Reviews sa Sailing and Sports Saving Money Scouting Sewing for Boy Shopping Suits Swap Stuff The Cat The Family The Home The New Babe The Wild and Nature This Moment To Donate Groceries TOS TOS Review Trivial Tidbits Vests Virtual Quilt Show Wedding

Archive By Date

instagram

Template Created By : ThemeXpose . All Rights Reserved.

Back to top