Because I'm Me

AND MORE

  • Home
  • Our Story
  • Contact
  • Become a Retailer
  • Shop
  • Facebook
  • Jude Harbor

Because I'm Me boys neckties come pre-tied, making life super easy for the receiver; all they have to do is put the tie on, adjust the neckband, and look like a million bucks.

However, sometimes the ties come untied. It happens.


Retying them is as simple as basic macrame, with a few adaptions.

But don't ask me to explain it verbally (or in print). I've tried. It's not my forte.

So, without further ado, here is the easiest way I know to explain how to tie a Because I'm Me children's necktie:

Lay the tie over the neckband, with narrow end facing down. This is where you decide the length of the necktie, if you want a long necktie leave a short short end, if you want a shorter necktie leave the short end longer.

Fold the tie over the band and bring the wide end down towards you and out to the side.

Fold the wide end of the tie over and across the short end.


Bring the wide end back behind the neckband and lift it upward. The front "knot" will now look like a trapezoid. While doing this adjust the neckband do keep it straight, you don't want it twisting or turning into a "squiggly" line, you want it as straight as possible, it just makes it easier in the end.


Bring the wide end of the tie back to the front of the tie and thread it through the "knot" you created, again keeping the neckband as straight as possible.


 Pull gently to bring the band through the knot so it is laying nicely.

Pinch both ends of the neckband with your fingers to keep the band straight and adjust/slightly tighten the necktie. Here you can adjust the lengths of both ends a little bit. Do not tighten too much, you want it to be comfortable, not super constricted and thin.


Finally, let the neckband slack a little, make sure your narrow end of the tie is in the back and not showing, and give the tie a final adjustment. Not too much tightening, just enough for it to ease into a perfect necktie shape.


I hope that answers your questions about tying a Because I'm Me Boys necktie. If it doesn't please leave a comment below or e-mail me any questions at becauseimme@gmail.com.

I'm hoping to get a video put together to make this even simpler.

If you need to retie your tie I suggest pressing it first,  not a lot just enough to loosen any wrinkles. I don't recommend machine washing ties, but they can be spot cleaned and air dried.

Thanks!
  • 0 Comments
Fort De Soto County Park, St. Petersburg, FL beach and campground

The kids had a Monday and Tuesday off of school so we, once again, visited our most favorite campground in Florida, Fort De Soto County Park.

Fort De Soto County Park, St. Petersburg, FL beach and campground

Fort De Soto has the most beautiful beaches. Nice and shallow a ways out, with wonderful soft white sand.

Fort De Soto County Park, St. Petersburg, FL beach and campground

Yes, the sun is setting and he's still in his pajama pants from the night before. One of the many benefits of camping.

Fort De Soto County Park, St. Petersburg, FL beach and campground

If you look closely in the water of the above image about 3/8" over and down from the picnic area point, you'll see a dolphin's fin. We were wandering along the seawall when we heard a huge splash, right next to us. So close to the seawall that I thought one of the kids had fallen in. After a quick head count we looked closely just as he came out of the water again, so incredibly close to us. It really felt like he was just looking for someone to play with. We watched him until he decided to head back out into the bay.  An absolutely beautiful and awesome bit of time for all of us.

Fort De Soto County Park, St. Petersburg, FL beach and campground

The view from our campsite, it never ceases to amaze me. And that tree never ceases to amaze the kids, I've got pictures of them climbing it last summer too.

Fort De Soto County Park, St. Petersburg, FL beach and campground

The campsites themselves are quite large, with this expansive grassy area just outside the site that really feels like an expansion of the site itself.

Fort De Soto County Park, St. Petersburg, FL beach and campground

Another pretty pier.

So, the exciting bit. My very own homemade awning. I've been meaning to mention this for months but never had the camper set up to take pictures of it.

DIY inexpensive Pop Up camper awning

We've done without an awning since we purchased the camper, so it wasn't an absolute necessity, but I found a way to do it inexpensively and couldn't resist.

Supplies:
1 10x12 tarp, adjust size to fit your camper
2 telescoping poles from Home Depot or Lowe's
line and two tent stakes to anchor the poles
4' paracord
12 washers
12 nylon spacers

To begin make 12 tarp attachers from the paracord, washers, and spaces. I cut the paracord, burned the end, strung the washer and spacer through it, strung the paracord back through the washer, then tied a simple knot. When finished they should look like this pinterest pin.

The pin originally linked to an Ebay listing of a fellow pop up camper owner who sells the attachers. I don't currently see any of his items listed, but if you don't want to do the work yourself it may be worth checking the link on occasion to see if he relists.

Push the spacer, with the attached paracord, through the holes of the tarp, adding an attacher at each hole along one side. You should have two attachers left over. When attached to the tarp the spacer should be one one side of the tarp grommet, the washer and knot on the other. I leave them attached for travel and they've not come out.

DIY inexpensive Pop Up camper awning

Before the camper is raised thread the spacers through the campers pre-existing C channel, left from the original canopy, and run the spacers down the channel until you've got one at each end. Seriously, do this before the camper is raised unless you're very, very tall ... it's much easier to do the threading and running at eye level.

DIY inexpensive Pop Up camper awning

Raise the camper.

Add attachers to the tarp holes at the two exposed corners. These attachers will connect to the extending poles.

DIY inexpensive Pop Up camper awning

If you happen to not be able to find one of your attachers the tarp can easily be attached to the poles with some of the line. No big deal.

DIY inexpensive Pop Up camper awning

Now raise the telescoping poles. We left ours lower than the height of the original canopy C channel so any water would drain off if it rained.

DIY inexpensive Pop Up camper awning

Stake your line and tighten.

Voila. Your camper now has a canopy. Yes, it's a little less classy than a pretty, fancy one but it works just as well. And I think it's well suited for a 20 year old pop up camper.

DIY inexpensive Pop Up camper awning

Grab a chair and sit down in your newly created shade and have a beer. Or a margarita. Or a tall glass of sweet tea. And admire your undeniable mad DIY skills while congratulating yourself on a job well done.

Fort De Soto County Park, St. Petersburg, FL beach and campground

One truth about having many children is that you will never, ever get them all to look photo ready at the same time. This was one of fourteen attempts. It won't end up on a Christmas card* (especially without the oldest in the picture), but the happy smiles and laughing make it pretty fantastic, I think.

Because I'm Me Bow and Neck Ties for men and boys

*Eating my words ... it did end up being our Christmas card with a snapshot of the oldest added in!


  • 8 Comments
Simple elementary age bead craft, perfect for Cub Scouts and more at Because I'm Me
Our Cub Scout Pack began the new school year with a Family Orientation meeting, to help the new folks feel more at home and to clarify a few details for the "older" families.

Midway through the meeting the scouts and their den leaders were excused to meet up in their dens while the meeting continued, because they honestly, truly, 110% couldn't care less about the business and financial stuff of the pack.

I wanted the newer boys to meet all the kids in their den and to get a chance to meet their den leaders, to see what the pack was like. I also wanted them to make something ... keeping their hands busy would help them feel less nervous and less crazy active, and having something to take home would help them feel a bond with the pack.

The challenge lay in finding a craft that would work for six year olds, but also work for 10 year olds, would take about 15-20 minutes, wouldn't be super expensive, and would be something they'd like to have.

After much Pinterest and Google searching I found a pony bead alligator. We're in Florida, so that's cool, but no way was that easy enough or quick enough. The bead alligator led to think of making a keychain, a much simpler alternative that the boys could actually use if they wanted to.

I opted for cobalt blue and yellow/gold pony beads because they are colors that symbolize Cub Scouting.

Simple elementary age bead craft, perfect for Cub Scouts and more at Because I'm Me

Each of our dens contain about 8-12 boys and we had no idea how many new or visiting boys and siblings would want to participate. All in all, these seemed like a daunting task for a den leader to teach solo. I was lucky enough to enlist the help of our Boy Scout troop (who also spoke to the boys about Boy Scouting early in the Family Orientation meeting), almost all of the troop came and helped, which made an awesome impression on the boys and their families and led to a few older siblings joining Boy Scouts. The Boy Scouts were divided among the dens, with the oldest scouts working with the Webelos dens.

And then the crafting began. This was the moment I learned of my big error. Not enough people had an idea of how the craft worked, in fact, I'd only showed two of the Boy Scouts. What I thought was self-explanatory wasn't in the time allotted. Fortunately, those two Boy Scouts and I were able to quickly teach the rest of the Boy Scouts and the den leaders. Totally my fault.

Most of the boys were able to finish their key rings before the end of the meeting and seemed to like them. Clean up was super easy, as it was just picking up a few stray beads.

I filled Ziploc bags, each with enough beads, 3' long sections of jute, and key rings for 15 boys as well as a sample completed key ring. Each Ziploc bag was placed on a separate table, with a sign for which den was meeting at that table.

To make the key ring:


Supplies needed:
3' section of twine, jute, whatever you can find that will work and will not fray super easily
1 key ring
17 plastic pony beads, in your choice of colors

Simple elementary age bead craft, perfect for Cub Scouts and more at Because I'm Me

Attach center of jute to key ring using a Lark's Head knot (create a loop in the center of the jute, wrap the loop around the key ring, run the two strands through it and tighten).

Simple elementary age bead craft, perfect for Cub Scouts and more at Because I'm Me

Slide one bead onto both strands of jute and bring that bead up to the top.

Simple elementary age bead craft, perfect for Cub Scouts and more at Because I'm Me

Slide three beads onto one strand of jute.

Simple elementary age bead craft, perfect for Cub Scouts and more at Because I'm Me

Run the other strand of jute through the same three beads, starting at the opposite end of the first strand.

Simple elementary age bead craft, perfect for Cub Scouts and more at Because I'm Me

Simple elementary age bead craft, perfect for Cub Scouts and more at Because I'm Me

Repeat the last step four more times, tightening the jute as you add each row of beads. Don't worry if it won't lay flat, we got our wet at the end and it fixed it perfectly. Also, if the jute isn't perfectly tight don't worry, you'll be able to tighten it more in a second.

Simple elementary age bead craft, perfect for Cub Scouts and more at Because I'm Me

Simple elementary age bead craft, perfect for Cub Scouts and more at Because I'm Me

Add one more bead onto both strands at the same time, in the same way the first bead was added.

Simple elementary age bead craft, perfect for Cub Scouts and more at Because I'm Me

Tighten the jute throughout the key ring as much as you can and tie an overhand knot using both strands of jute. If your overhand knot doesn't hold the last bead on tie another on top of the first.

That's it! Enjoy your key ring.

Of course, this isn't exclusively a Cub Scout craft, change the colors and have fun!

River lost his neckerchief slide at that pack meeting so I took his key ring apart and made him a ring neckerchief slide out of it. Works great.

bead cub scout neckerchief slide at bobcat ceremony
  • 0 Comments
Enter to win Purex Crystals, entries accepted through Oct. 19, 2014.

If you don't have a Cub Scout this post probably won't apply to you. But if you do have a Cub Scout this post will save a bit of aggravation.

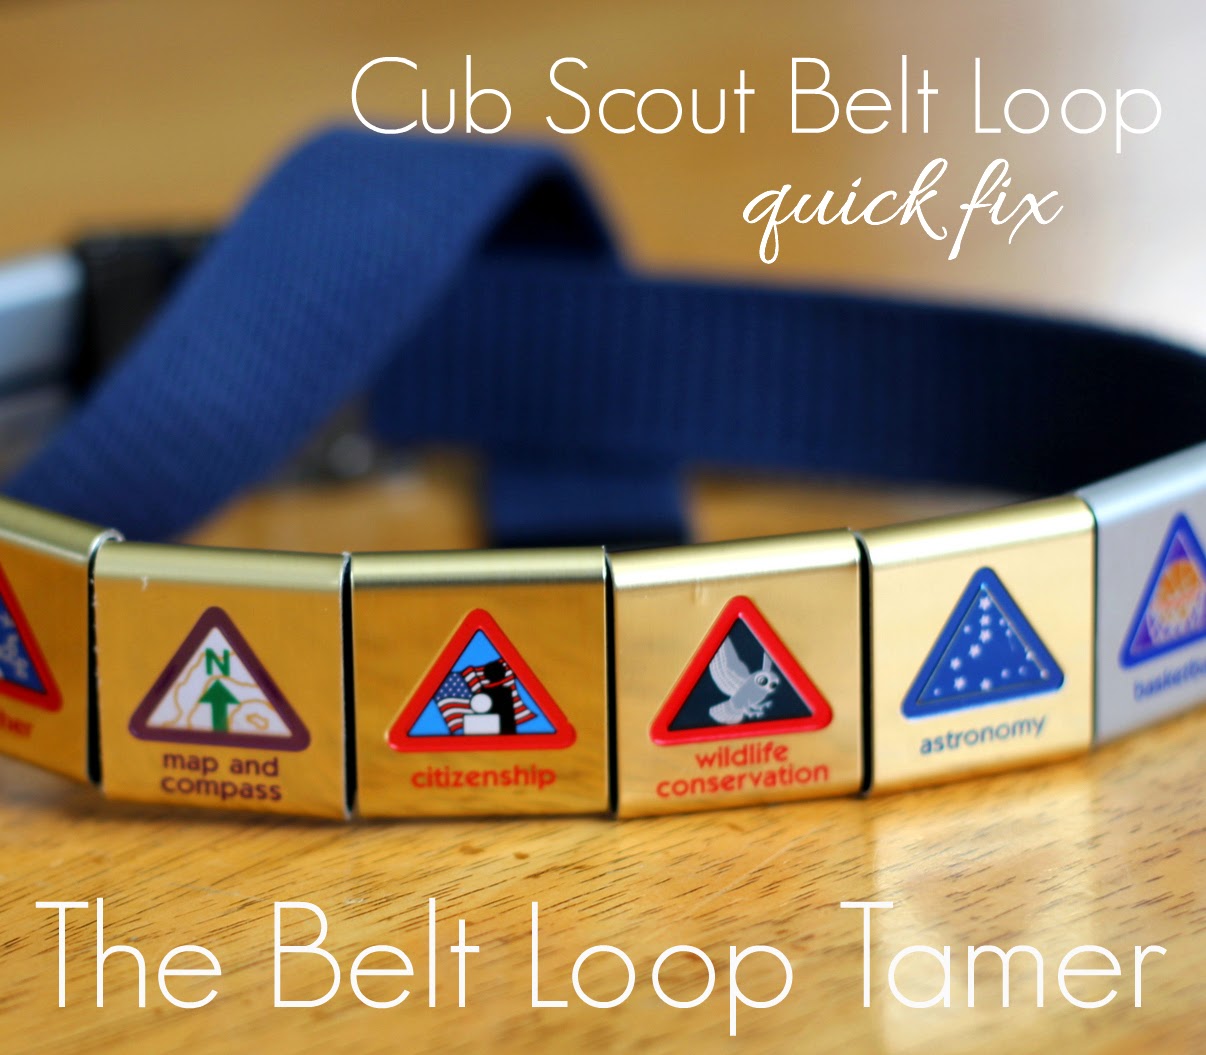
the FREE cure for slipping Cub Scout belt loops

River is now a Tiger Scout. Because he attended summer day camp he received 10 belt loops at our first Pack Awards Meeting. Woo hoo!

I'm pretty sure the boy is going to need a belt to hold up his belt!

As we put his metal loops on his belt I was reminded of a simple little fix I used for Kaden's belt, our own Cub Scout Belt Loop Tamer.

The problem: 

The belt loops slide very easily onto the scout's belt, but they also slide off very easily, which can be frustrating when taking the belt off and on.

The solution:

To remedy this I simply sewed a button to the backside of the belt, directly under where the most recent belt loop sits.

the cure for slipping Cub Scout belt loops

Then I slid that last belt loop over the button.

the cure for slipping Cub Scout belt loops

 The thread won't show through on the front, so color isn't a big deal.

the cure for slipping Cub Scout belt loops

The belt loops can still be taken off, the button just provides good tension to hold the belt loops in place.

And, voila, problem solved in less than a minute using a button I already had.

the cure for slipping Cub Scout belt loops

My Cub can now easily get his belt on and off, and there's far less worry about losing those hard-earned belt loops that he wants to show off at every den and pack meeting!

Sew Sew Much More Handcrafted Small Quilts and Camera Strap Covers
  • 5 Comments
Older Posts Home

Follow Us

  • instagram
  • facebook
  • rss

BANNER SPOT

Shop

recent posts

Labels

Arts and Crafts Baby Sewing Because I'm Frugal Because I'm Me Because I'm Me Website Bow Tie Boys Fashion Busch Gardens Camera Cats Fashion Childcare Computer Stuff Cooking and Recipes Coupons Craft Show Crafting and Sewing Ditto Kiddo dog bandana Etsy EWP Family Vacations Fashion Set Mens Food Freebies Frugal Friday Fun and Free Gift Ideas Give Away Giving and Charitable Doings Green Life Holiday Fun Stuff Home Schooling Homeschooling Essentials Jude Harbor Link Up Mens Fashion Neckties Other People's Crafting Outdoor Activities Photography Pocket Square Pop Up Camper Publix Purex Insider Quick Tutorials Quilt Recommended Sites and Links Reviews sa Sailing and Sports Saving Money Scouting Sewing for Boy Shopping Suits Swap Stuff The Cat The Family The Home The New Babe The Wild and Nature This Moment To Donate Groceries TOS TOS Review Trivial Tidbits Vests Virtual Quilt Show Wedding

Archive By Date

instagram

Template Created By : ThemeXpose . All Rights Reserved.

Back to top