
Burp Cloth Tutorial

As promised, here's a tutorial for the burp cloths I make.
Before going any further, please note the following:
- I stink at giving directions so bear with me and ask as needed
- All pictures can be enlarged by clicking on them
- See a mess in my sewing room? I tried to crop it all out, just know that it's worse than it appears
- This is how *I* make these ... it may or may not be the very best way, experiment and have fun
- "Cloth" refers to the cotton piece of fabric, "diaper" refers to the cloth diaper

Start with a prefolded cloth diaper. One side of the diaper has a seam, I consider this to be the backside. The diapers come very wrinkled but will press very easily and are very easy to manipulate.
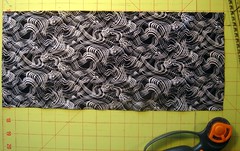
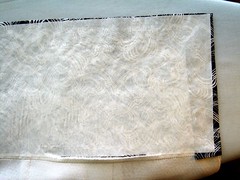
Cut a piece of cloth. I use a 7" by 16" rectangle. Now that you've cut the cloth embellish it if you desire to ... I like adding a row of rick rack or ribbon.

Lay your cut piece of cloth right side up. The decorated edge will be the edge you do not sew at this time, so be sure it's away from the sewing machine. If your cloth has a directional print the lower edge of the print is the edge you'll abut to the cloth diaper and sew. Atop the cloth place the cloth diaper (one of the two shorter sides), bottom side down, lining up the lower edges of both pieces and centering the cloth fabric, leaving an overhang on both ends of the diaper. Stitch close to edges, covering existing seam in the cloth diaper (3/8" seam).
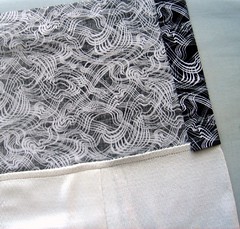
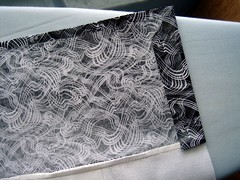
After sewing press the cloth diaper seam up towards the piece of cloth, straightening out the diaper as you go. Then press the side seams of the cloth in on both sides, lining up the side seam with the edge of the diaper. Finally press the top edge down about 3/8-1/2").
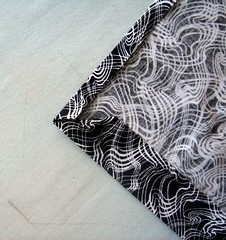
Following your pressed seams, miter the two top corners of the cloth.
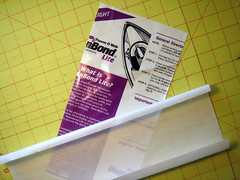
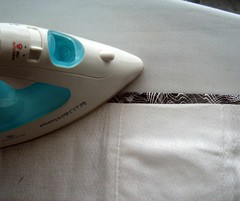
Cut a piece of Heat n' Bond Lite to fit your now sewn, folded, and pressed piece of cloth. You want to cover the entire cloth, with no Heat n' Bond overhang. I cut a piece approximately 6.25" by 13.25".
Press Heat n' Bond Lite into place. Having a little underage here is fine. What you're creating is an adhesive to hold the diaper to the fabric for the final sewing step. Because the diaper has a lot of give this bond will keep the two fabrics in place and create a much more polished finished piece. Cool.
Remove paper backing.
Fold the cloth up to lay atop the diaper. Do not fold down the edge of the diaper, instead fold around it to create the slight bit of fabric showing on the backside. Turn over the diaper and carefully line up diaper sides to the cloth sides (manipulate the diaper if necessary) and press the overhang seam gently on the backside, keeping it even and neat. (I'm not sure this step is clear ... let me know if it needs to be reworked).
Flip back over and continue pressing the cloth to the diaper. Side edges should meet as closely as possible, if not exactly. Cool.
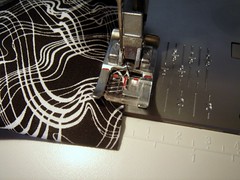
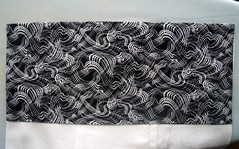
Join two pieces around the edges of the cloth with a zig-zag stitch hanging slightly over the edge as you sew. Use white thread for the back (diaper side) and colored, or coordinating, fabric for the frontside.
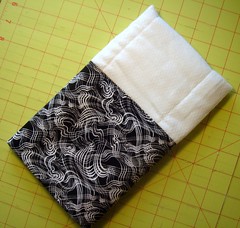
Voila. Fold neatly, wrap with a bow, and give it away. Or throw it over your shoulder and catch some spit up.
1 Comment
Thanks so much for this! I love these as gifts. I'm definitely giving your method a try!
ReplyDelete