Boy Shorts ... From Mama's Shorts
I always love a good re-use and re-purpose, and this one was so easy and practical I had to share it.
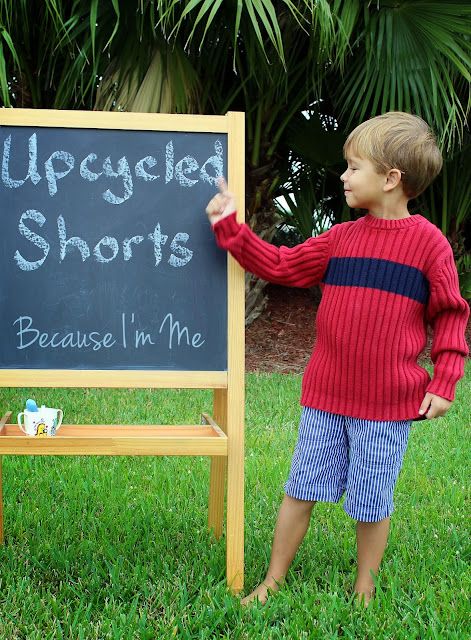
Rather than toss a ripped pair of shorts I thought I'd try to make them into something for one of the kids. The rip (near the back center seam) was too damaged to fix, but the rest of the shorts were in great condition, practically new, and the blue and white striped fabric is so comfy I knew I couldn't just toss them without at least trying to save them.
 Immediately I thought to make River some shorts. He's outgrowing, quickly, the ones I made him a few years ago so a new pair really made sense. Plus, he's young and not yet fussy about what he wears, making him a good guinea pig for my sewing experiments.
I wish I'd taken pictures of this project while it was happening, but I didn't so bear with me and I'll do my best to explain this simple upgrade.
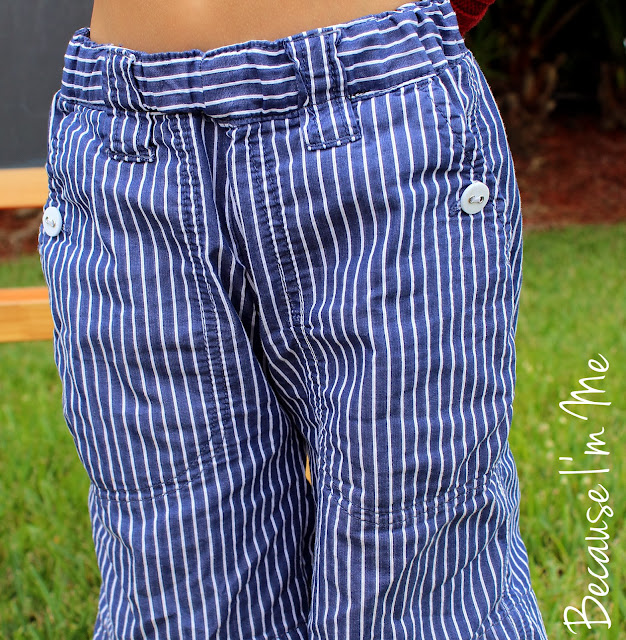
To make River's shorts I laid a paid of his shorts, folded in half, on top of the damaged shorts, lining up the outside seams. I didn't want to cut along the outside side seams, they were well made and I didn't want to disturb the front pockets at all ... and there's no point in resewing a perfectly good seam that would work just fine. I matched the waistband of my shorts to the waistband of his shorts, because I could easily reuse the waistband that was already there. I opted to keep the hem on my shorts as the new hem for his shorts. When all was said and done all I cut was the inside crotch and leg.
I first sewed the inside leg seams, matching the hemed bottom of the shorts and trimming the crotch end of
the seam. Because these were women's shorts they were cut to fit a woman, so a little adjusting was needed to make these just right for a young boy.
I then pulled the stitches out of the waistband butting up to the newly cut raw edges of the crotch seam with a seam ripper, about two inches on each side so I could open the waistband up fully to resew it. I needed an elastic casing, so sewing directly the waistband wasn't an option (plus it would have looked awkward and might have been uncomfortable). I sewed the crotch seam, from the front top of the opened waistband to the back top of the open waistband.
All that's left at this point is the waistband. I folded down and restitched the front of the waistband closed. I didn't stitch the back waistband closed yet, leaving it open to thread the elastic. I threaded elastic through the waistband and stitched the two ends together (make sure there isn't a twist anywhere!). Second to last step was to sew the back casing closed.
Last step: add a tag to the back somewhere, if you haven't already added one when you sew the back waistband closed. I chose the back pocket, just for fun. Without a tag River really won't pay the least big of attention to whether his shorts are on backwards or frontwards, so that tag comes in very handy.
For the older boys I would sew these from mens shorts. Women's shorts really don't give the length they need - not a problem with a "still has lots of growing to do" five year old, but not cool at all for almost teenagers bordering on 5 feet tall.
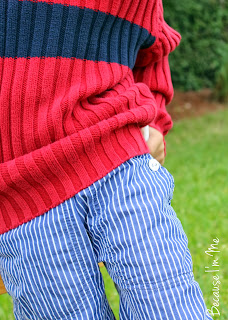
Next time I'd pay more attention to the back pocket. These were really wide and after cutting and sewing they've become a sort of modified "unipocket". It doesn't look unintentional, so it's no big deal.
In total this project took less than 15 minutes. 15 minutes well spent if you ask me (and River).
Time to hit the closet and the donate pile and see what you've got ready to turn into a pair of "new" shorts.
I'd love to hear about your re-purposing projects.
Rather than toss a ripped pair of shorts I thought I'd try to make them into something for one of the kids. The rip (near the back center seam) was too damaged to fix, but the rest of the shorts were in great condition, practically new, and the blue and white striped fabric is so comfy I knew I couldn't just toss them without at least trying to save them.
 Immediately I thought to make River some shorts. He's outgrowing, quickly, the ones I made him a few years ago so a new pair really made sense. Plus, he's young and not yet fussy about what he wears, making him a good guinea pig for my sewing experiments.
I wish I'd taken pictures of this project while it was happening, but I didn't so bear with me and I'll do my best to explain this simple upgrade.
To make River's shorts I laid a paid of his shorts, folded in half, on top of the damaged shorts, lining up the outside seams. I didn't want to cut along the outside side seams, they were well made and I didn't want to disturb the front pockets at all ... and there's no point in resewing a perfectly good seam that would work just fine. I matched the waistband of my shorts to the waistband of his shorts, because I could easily reuse the waistband that was already there. I opted to keep the hem on my shorts as the new hem for his shorts. When all was said and done all I cut was the inside crotch and leg.
I first sewed the inside leg seams, matching the hemed bottom of the shorts and trimming the crotch end of
the seam. Because these were women's shorts they were cut to fit a woman, so a little adjusting was needed to make these just right for a young boy.
I then pulled the stitches out of the waistband butting up to the newly cut raw edges of the crotch seam with a seam ripper, about two inches on each side so I could open the waistband up fully to resew it. I needed an elastic casing, so sewing directly the waistband wasn't an option (plus it would have looked awkward and might have been uncomfortable). I sewed the crotch seam, from the front top of the opened waistband to the back top of the open waistband.
All that's left at this point is the waistband. I folded down and restitched the front of the waistband closed. I didn't stitch the back waistband closed yet, leaving it open to thread the elastic. I threaded elastic through the waistband and stitched the two ends together (make sure there isn't a twist anywhere!). Second to last step was to sew the back casing closed.
Last step: add a tag to the back somewhere, if you haven't already added one when you sew the back waistband closed. I chose the back pocket, just for fun. Without a tag River really won't pay the least big of attention to whether his shorts are on backwards or frontwards, so that tag comes in very handy.
For the older boys I would sew these from mens shorts. Women's shorts really don't give the length they need - not a problem with a "still has lots of growing to do" five year old, but not cool at all for almost teenagers bordering on 5 feet tall.
Next time I'd pay more attention to the back pocket. These were really wide and after cutting and sewing they've become a sort of modified "unipocket". It doesn't look unintentional, so it's no big deal.
In total this project took less than 15 minutes. 15 minutes well spent if you ask me (and River).
Time to hit the closet and the donate pile and see what you've got ready to turn into a pair of "new" shorts.
I'd love to hear about your re-purposing projects.


0 Comment